Installation and Configuration
Getting started with Isalos is a straightforward process thanks to its plug-and-play setup. The platform comes pre-packaged with everything necessary to run it and get started with your workflows, ensuring a seamless installation with no external dependencies.
Install Isalos
Visit the official download page of NovaMechanics’s Isalos installers to download the appropriate installer for your OS.
Windows
Downloading the Installer
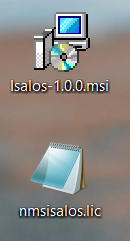
Download the Isalos Windows installer package and once downloaded double click the .msi file.
Run the Installer
After double clicking the installer, the installation wizard will pop up to guide you through the process of selecting your preferences for the installation of the program [1].

The installation path will default to the “Program Files” directory of your computer. It is advised to change your installation path to a user directory, especially in the case that you do not have administrative access permissions, which you will need for a successful installation. To change the installation path, click on the Change… button[2], and navigate to your user directory [3] and [4].

Once you navigate to the directory of your choice, you must create a new folder where the Isalos package will be installed. The installer will not allow the installation in a non-empty directory. To create a new folder on the spot, click on the New Folder button[5].

After creating a new folder [6], you could also rename it as desired [7] and click OK [8] and Next [9] after confirming the installation directory.


You also have the option to create a desktop shortcut for the Isalos application for ease of launch of the application. Check the checkbox [10] if you wish for a shortcut to be created, otherwise uncheck the checkbox and click Next [11].

Finally, Isalos is ready to be installed, by clicking the Install button [12], you may be prompted by User Access Control to allow the installation of the software, of which you can accept to go through with the installation. This completes the installation process on Windows. Click on the Finish button to close the installation wizard [13].

After the installation is complete, there are a couple more steps that are needed to get the Isalos Analytics Platform up and running.
Placing License in Installation Folder
Before launching Isalos for the first time, you must place your valid license file in the installation directory. Depending on the location of your installation, you may need administrator access permissions to do so. Navigate to the installation directory of Isalos, and place your license file there [1]. Once you have done this, you can double click the Isalos executable [2] to launch the application successfully.

MacOS
Downloading the Installer
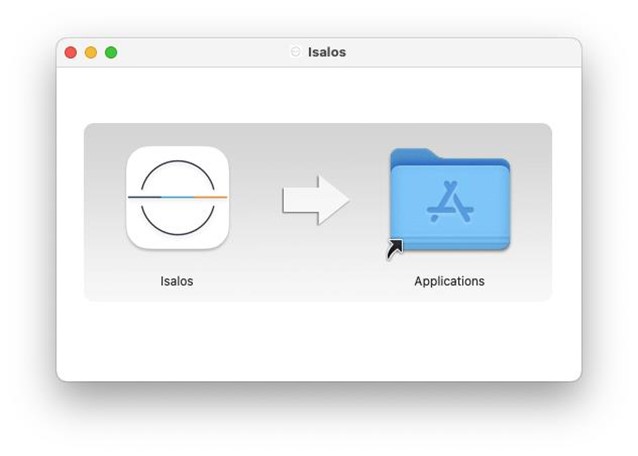
Download the Isalos macOS installer .dmg file. Once the download is complete, double-click the .dmg file to open the disk image [1].

Run the Installer
After opening the disk image, a new Finder window will appear showing the Isalos application icon. Drag and drop the Isalos icon into your Applications folder. This installs the application on your system.
Placing License in Installation Folder
Before launching Isalos for the first time, you must place your valid license file within the application’s internal folder structure. This step is essential for the application to recognize your license.
Open the Applications folder. Right-click on the Isalos.app icon and select Show Package Contents [2].

Navigate to the Contents/ folder [3] and place your valid license file inside this folder [4]. You may be prompted to authenticate with an administrator password to complete this step.


Note: Ensure the license file is named correctly and has not been modified. Improper placement or filename issues may prevent the app from detecting your license.
Once the license file is correctly placed, you can double-click the Isalos application [5] to launch it successfully.

Linux
Downloading the Installer
Choose the appropriate package for your system:
- Debian-based systems (Ubuntu, Debian, Linux Mint, etc.) \(\rightarrow\) Download the .deb package.
- RHEL-based systems (Fedora, CentOS, Oracle Linux, AlmaLinux, etc.) \(\rightarrow\) Download the .rpm package.
Verifying Package Signatures
Before installing, you can verify the integrity and authenticity of the downloaded package.
Debian-based Systems (.deb)
Ensure gpg is installed before verifying the package:
sudo apt install -y gnupg
Download the following files from the download page:
- Application package: isalos-{version}.deb
- Signature file: isalos-{version}.deb.sig
- Public key: isalos.key
Import the Public Key
To validate a build’s signature, you must first import and trust the Isalos’s public code-signing key.
- Import the public key:
gpg --import isalos.key
- Trust the Key (Optional but recommended to avoid warnings during verification). To trust the public key, extract its fingerprint:
gpg --fingerprint
Edit the key and set the appropriate trust level:
gpg --edit-key <fingerprint> trust
After running the command, you’ll enter the interactive key editing mode. The prompt will ask you to choose a trust level. Select the trust level and press Enter to confirm. Finally exit the edit mode by typing quit and pressing Enter.
Verify the Signature
Run the following gpg command to check the package signature:
gpg --verify isalos-{version}.deb.sig isalos-{version}.deb
If the verification is successful, you should see a message like:
gpg: Good signature from "NovaMSoft <projects@hermes.novamechanics.com>"
RHEL-based Systems (.rpm)
Download the following files from the download page:
- Application package: isalos-{version}-{release}.x86_64.rpm
- Public key: isalos.key
Import the Public Key
On RedHat-based Linux systems, validation is built into the rpm command, however you first need to import the public key into rpm.
Import it with the following command:
rpm --import isalos.key
Verify the Signature
Use the following command to verify the package signature:
rpm --checksig isalos-{version}-{release}.x86_64.rpm
If the verification is successful, you should see a message like:
isalos-{version}-{release}.x86_64.rpm: digests signatures OK
Another method to verify that the package signature exists or not is by running:
rpm -qpi isalos-{version}-{release}.x86_64.rpm
The output should indicate a signature field with the signature present.
Installing on Debian-based Systems (.deb)
Prerequisites
Ensure your system is up to date before installing:
sudo apt update && sudo apt upgrade -y
Installation Steps
- Navigate to the directory where the downloaded .deb file is located.
- Run the following command to install:
sudo apt install ./isalos-{version}.deb
This will install Isalos in the </opt> directory.
Placing the License File
Before running the application, ensure that the license file is placed in the lib folder of the installation directory:
cp /path/to/nmsisalos.lic /opt/isalos/lib/
Running the Application
Once installed, you can launch the application by:
/opt/isalos/bin/Isalos
Or using the application menu.
Installing on RHEL-based Systems (.rpm)
Prerequisites
Ensure your system is up to date before installing:
sudo dnf update -y
Installation Steps
- Navigate to the directory where the downloaded .rpm file is located.
- Run the following command to install:
sudo dnf install isalos-{version}-{release}.x86_64.rpm
For older CentOS versions using <yum>, replace <dnf> with <yum>.
This will install Isalos in the </opt> directory.
Placing the License File
Before running the application, ensure that the license file is placed in the lib folder of the installation directory:
cp /path/to/nmsisalos.lic /opt/isalos/lib/
Running the Application
Once installed, you can launch the application by:
/opt/isalos/bin/Isalos
Or using the application menu.
Activating the license
On launching Isalos for the first time, before being able to unlock and use the software, you will need to activate your license by reading and accepting the user terms and conditions. Navigate to the File button on the top ribbon [1], and select Activate [2].

A window with the End User License Agreement [3] will appear. After reading the terms, you can accept [4] them and your license will be activated.

Upon accepting the terms, Isalos will be unlocked and ready to use.
Uninstall Isalos
To uninstall Isalos, please follow the steps specific to your computer’s operating system.
Windows
To uninstall Isalos, there are two alternative options:
- Go to
Windows Settings\(\rightarrow\)Apps & features\(\rightarrow\)Installed Apps, find Isalos, click the three dots [1], and selectUninstall[2].

- Go to
Control Panel\(\rightarrow\)Programs and Features, find Isalos, right-click on it, and selectUninstall[1].

MacOS
To uninstall Isalos from your Mac:
- Go to your Applications folder.
- Locate
Isalos.app, right-click on it, and selectMove to Trash.
Linux
Debian-based Systems
To remove the application, run:
sudo apt remove isalos -y
RHEL-based Systems
To remove the application, run:
sudo dnf remove isalos -y
Instructions last updated on April 2025